When you embark on the journey of receiving a new tattoo, the excitement of adorning your body with meaningful art is palpable. However, the process extends far beyond the tattoo chair; the aftercare phase is equally, if not more, critical for the longevity and vibrancy of your new ink. While all tattoos demand diligent care, those placed on areas of the body that frequently bend, stretch, and crease – such as the wrists, neck, elbows, and knees – present a unique set of challenges that require a specialized approach to healing. Understanding these intricacies is paramount for anyone considering or already sporting art in these dynamic zones.
The challenge unveiled: Why creased areas demand special aftercare
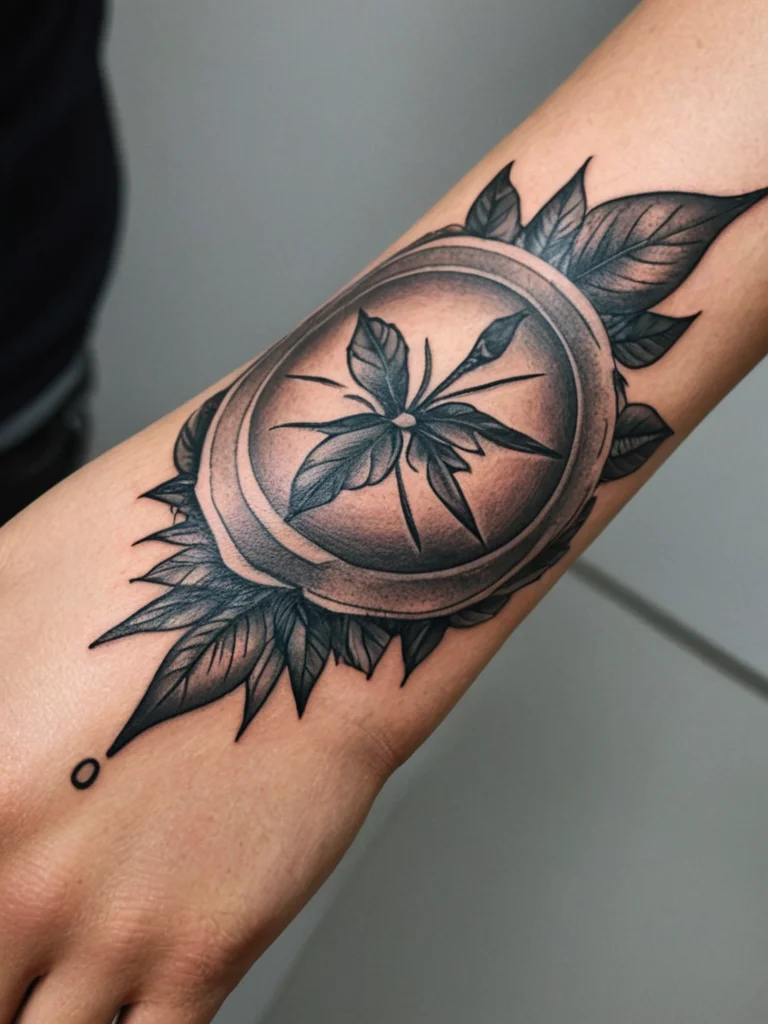
The human body is a marvel of engineering, designed for movement and flexibility. However, this very adaptability can become a formidable adversary when it comes to healing a fresh tattoo. Areas like the wrists, the front and sides of the neck, elbows, and knees are characterized by skin that is constantly in motion. Every turn of the head, every flex of the wrist, every bend of the elbow or knee places stress and tension on the delicate, newly wounded skin. This incessant movement is the primary reason why healing a tattoo in these locations demands a level of attentiveness and strategic aftercare that surpasses what might be sufficient for a tattoo on a flatter, less mobile area, such as the bicep or calf.
To fully grasp the magnitude of this challenge, consider the physiological processes at play. When a tattoo needle penetrates the skin, it creates thousands of tiny punctures, effectively forming an open wound. The body’s natural response is to initiate a complex healing cascade, which involves inflammation, tissue repair, and the formation of a protective scab. In a stable, non-creased area, this scab can form undisturbed, creating a strong, protective barrier under which the new skin can regenerate. However, in high-mobility zones, this delicate process is continually interrupted. Each movement can stretch, crack, or even dislodge the nascent scab, tearing at the newly formed skin cells beneath. This not only prolongs the healing time but significantly increases the risk of complications.
Think of it like trying to heal a deep cut on your knuckle versus a cut on your forearm. The knuckle cut, constantly subjected to bending and stretching, is far more prone to reopening, scabbing poorly, and potentially scarring. The same principle applies to tattoos. The constant flexion and extension of the skin in these areas can lead to several undesirable outcomes: compromised ink retention, where pigment might ‘fall out’ in patches due to repeated trauma; increased risk of infection, as the integrity of the skin barrier is repeatedly broken; and the potential for scar tissue formation, which can distort the tattoo design and texture.
Furthermore, the skin in these creased areas can often be thinner and more prone to irritation. The folds and creases themselves can trap moisture or create friction points with clothing, further exacerbating the healing difficulties. Tattoo artists universally understand this intrinsic vulnerability. They often counsel clients extensively on the unique demands of these placements, emphasizing that while the aesthetic appeal of a wrist cuff or a neck piece is undeniable, the commitment to its proper healing is equally substantial. Therefore, approaching a tattoo in these ‘flex zones’ without a specialized aftercare plan is akin to navigating a complex maze without a map – you might eventually reach the destination, but the journey will be arduous and fraught with potential setbacks.
Common pitfalls & how to spot them: Avoiding healing complications
Despite the best intentions, the unique biomechanics of creased areas make them susceptible to a specific set of healing complications. Recognizing these common pitfalls early is crucial for effective intervention and ensuring the optimal outcome for your tattoo. A proactive and informed approach can often prevent minor issues from escalating into significant problems that might compromise the integrity or appearance of your artwork.
One of the most prevalent issues is **premature or excessive movement**. This is the nemesis of any healing tattoo, but particularly so in flex zones. If you notice your tattoo feeling excessively tight, stretched, or if the scabbing appears to be cracking or flaking off in large, rigid pieces rather than small, fine ones, it’s a strong indicator that the area is being moved too much. The constant pulling can prevent the epidermal layer from properly reknitting, leading to uneven healing and potential ink fallout, where patches of the tattoo appear faded or missing. For instance, a wrist tattoo repeatedly bent for typing or lifting can show distinct lines of compromised healing along the creases.
Another common mistake lies in the delicate balance of **moisturizing**. It’s a common misconception that more moisturizer is always better. While hydration is vital for skin elasticity, particularly in moving areas, **over-moisturizing** can suffocate the tattoo, trapping excessive moisture and creating a breeding ground for bacteria, leading to a pasty appearance, tiny bumps, or even white pimple-like lesions. Conversely, **under-moisturizing** in these constantly stretching areas can lead to excessive dryness, tightness, and deep, rigid scabbing that is prone to cracking. The ideal balance is a thin, breathable layer that keeps the skin supple without feeling greasy or occluded. If your tattoo feels perpetually sticky or looks excessively shiny, you might be over-moisturizing. If it feels like a dry, brittle piece of paper and looks flaky, it’s likely too dry.
**Friction and rubbing** are silent saboteurs. In creased areas, clothing, bedding, and even your own body parts can exert constant pressure and abrasion. For a neck tattoo, high collars, scarves, or even a seatbelt can cause continuous irritation. For wrists, tight sleeves, watches, bracelets, or even the edge of a desk can be problematic. Signs of friction damage include persistent redness, localized irritation, small red bumps, or a generally dull and inflamed appearance along the edges of the design. If you notice a particular area of your tattoo looking more angry or agitated than the rest, consider what might be rubbing against it.
While some redness and swelling are normal immediately after getting tattooed, **signs of infection** demand immediate attention. These are critical to differentiate from normal healing. Watch for: **excessive redness** that spreads beyond the tattoo’s borders and doesn’t subside after a few days; **unusual swelling** that increases over time or is accompanied by warmth to the touch; **persistent, throbbing pain** that intensifies rather than diminishes; **pus or greenish/yellowish discharge** emanating from the tattoo; and **fever or chills**, which indicate a systemic infection. If any of these symptoms appear, particularly pus or fever, do not hesitate to contact your tattoo artist and, more importantly, a medical professional.
**Ink fallout or patchiness** can be a disheartening sight. While some very minor fading is normal during healing, significant patches where the ink appears to have vanished or lightened considerably, creating an uneven, mottled appearance, often indicate that the skin was subjected to too much movement or friction during the critical initial healing phase. This is particularly common along the very lines of creases. If you observe distinct areas where the ink simply isn’t taking, it’s a sign that the healing environment was compromised, and a touch-up will likely be necessary once fully healed.
Finally, **scarring** is a potential long-term consequence of poor healing, especially in areas of high tension. While hypertrophic scars (raised, red scars that stay within the boundary of the original wound) are more common than keloids (scars that grow beyond the original wound site and are genetically predisposed), both can be exacerbated by constant movement and repeated trauma to the healing skin. If your tattoo feels perpetually raised, ropey, or itchy long after the initial healing period, it might be developing scar tissue. Early identification and proper aftercare can often minimize this risk, but severe cases may require dermatological consultation.
By remaining vigilant and understanding these indicators, you empower yourself to be an active participant in your tattoo’s successful healing journey, turning potential setbacks into manageable challenges.
The aftercare arsenal: Step-by-step healing strategies for flex zones
Successfully healing a tattoo in a creased area requires more than just good intentions; it demands a tactical, step-by-step approach tailored to the unique biomechanics of these regions. Think of it as a specialized training regimen for your skin, designed to promote optimal recovery despite constant movement. This aftercare arsenal combines tried-and-true methods with specific considerations for high-mobility zones, ensuring your tattoo heals beautifully and retains its original vibrancy.
Initial bandaging: Strategic protection
The first line of defense is the initial bandage applied by your tattoo artist. For creased areas, the choice of bandage can be particularly impactful. Many artists now recommend **Saniderm or Tegaderm (medical-grade adhesive films)** for these locations. These breathable, flexible films act as a second skin, creating a moist healing environment that is ideal for wound recovery, while simultaneously protecting the tattoo from external contaminants and, crucially, minimizing the impact of movement. The flexibility of these films allows for some degree of natural movement without tearing the healing skin beneath, making them superior to traditional plastic wrap or gauze for flex zones. If your artist applies Saniderm, follow their instructions meticulously regarding how long to keep it on (typically 1-3 days for the first application, sometimes followed by a second application for another few days). The key is to ensure the film is applied smoothly, without wrinkles over the tattoo, to prevent uneven pressure points.
If your artist uses a traditional **absorbent pad and tape wrap**, the aftercare will begin sooner. This type of bandage typically stays on for only a few hours. The challenge here is that as soon as the bandage comes off, the tattoo is exposed to movement. Therefore, the subsequent cleaning and moisturizing steps become immediately critical, and you must be extra diligent about minimizing motion.
Gentle cleaning: The foundation of hygiene
Once the initial bandage is removed (or after a few hours if using traditional wrap), the cornerstone of aftercare is **gentle and consistent cleaning**. For tattoos in creased areas, this step is vital to prevent bacterial buildup in skin folds and to remove any exudate or ink residue that can accumulate. Tattoo artists recommend cleaning your tattoo 2-3 times a day, or whenever it feels dirty or sticky.
Always start by washing your hands thoroughly with an antibacterial soap. Then, with clean hands, gently wash the tattoo using an **unscented, antibacterial liquid soap** (e.g., Dial Gold or specific tattoo cleansers). Use lukewarm water – never hot, as it can open pores too much and potentially leach ink, and never cold, as it can be uncomfortable and less effective at cleaning. Lather the soap in your hands and gently apply it to the tattoo, using your fingertips to very lightly massage the area in circular motions. The goal is to remove plasma, excess ink, and any environmental contaminants without scrubbing or irritating the delicate healing skin. For a neck tattoo, this might involve careful tilting of the head to access all angles, and for a wrist tattoo, gently flexing just enough to clean without putting undue strain. Rinse thoroughly until all soap residue is gone. Finally, **pat the tattoo completely dry** with a clean, soft paper towel – never a cloth towel, which can harbor bacteria and snag on the healing skin. Do not rub or drag the towel.
Moisturizing with precision: Suppleness for mobility
After cleaning and thorough drying, **moisturizing is absolutely critical** for tattoos in creased areas. It maintains the skin’s elasticity, preventing it from becoming dry, tight, and prone to cracking with every movement. However, the golden rule here is ‘less is more’. Apply a very thin layer of an **unscented, non-comedogenic moisturizer** specifically designed for tattoo aftercare or a product like A&D ointment, Aquaphor, or plain unscented lotion (e.g., Eucerin, Lubriderm). Avoid petroleum jelly, which can be too heavy and occlusive. The tattoo should look hydrated, not greasy or shiny. If it looks shiny, you’ve used too much, and you should gently blot away the excess with a clean paper towel.
Apply moisturizer 2-3 times a day, or whenever the tattoo feels dry or tight. For a wrist tattoo, ensure you apply a thin layer even into the creases. For a neck tattoo, apply across the full range of motion that the skin experiences. The goal is to keep the skin supple and flexible, allowing it to move without cracking the healing epidermis. This continuous hydration helps the new skin cells form smoothly and prevents the ‘pulling’ sensation that often accompanies dry, healing skin in these areas.
Minimizing movement: The ultimate strategy
This is arguably the most challenging, yet most impactful, aspect of healing tattoos in creased areas. **Restricting movement as much as humanly possible** is paramount, especially during the first 1-2 weeks. This doesn’t mean you have to become a statue, but it does mean conscious effort and adaptation:
For Wrist Tattoos: Avoid excessive wrist flexion and extension. If your job involves typing or repetitive hand movements, consider taking frequent breaks or modifying your posture. Sleeping with a soft, supportive brace or gently taped splint (ensure it doesn’t apply direct pressure on the tattoo) can prevent unconscious movement during sleep. Try to keep your hand and wrist as straight as possible throughout the day, being mindful of everyday tasks like opening doors, lifting objects, or even holding a phone.
For Neck Tattoos: Limit turning your head sharply or looking drastically up or down. This can be challenging for daily activities like driving, working at a computer, or even talking. Consider using a neck pillow for sleeping, or arranging pillows to support your head in a neutral position to prevent unconscious craning or twisting. Be mindful of posture and try to keep your head aligned with your spine as much as possible. Avoid exercises that involve neck rotation or strain.
For Elbow/Knee Tattoos: Minimize extreme bending and straightening. This might mean avoiding deep squats, lunges, or bending down on your knees. When sitting, try to keep your legs or arms extended to avoid prolonged creasing. Consider wearing loose, soft clothing that doesn’t restrict movement but also doesn’t constantly rub against the tattoo.
Protective clothing: Your second skin
Once the initial bandaging phase is over and the tattoo is drying between moisturizations, **wearing loose, breathable clothing** is essential. Natural fibers like cotton are ideal as they allow the skin to breathe and prevent irritation. Avoid tight sleeves, collars, or waistbands that might chafe or press against the healing tattoo. For neck tattoos, opt for open-collared shirts or V-necks. For wrist tattoos, choose short sleeves or sleeves wide enough not to constrict the area. The aim is to create a comfortable, friction-free environment around the tattoo.
Hydration and nutrition: Fueling from within
While external care is vital, remember that skin health is also deeply connected to overall well-being. **Staying well-hydrated** by drinking plenty of water supports skin elasticity and regeneration. A **balanced diet** rich in vitamins, minerals, and proteins provides the necessary building blocks for healthy tissue repair. These internal factors work synergistically with your external aftercare routine to accelerate healing and improve the final appearance of your tattoo, particularly in areas that are under constant physiological stress.
By meticulously following these steps and adapting them to the specific demands of your body’s creased areas, you significantly increase the likelihood of a flawless heal, allowing your art to shine unimpeded by the challenges of movement.
Troubleshooting & advanced hacks: Ensuring flawless results in tricky spots
Even with a diligent aftercare routine, tattoos in creased areas can sometimes present unexpected challenges. Knowing how to troubleshoot common issues and employing advanced hacks can be the difference between a good heal and a truly flawless one, especially in these high-stakes locations. This section delves into practical solutions and clever strategies to navigate the intricacies of healing in dynamic skin zones.
Dealing with stubborn swelling and redness
While initial swelling and redness are normal, persistent or increasing inflammation, especially in mobile areas, can be concerning. If your tattoo feels unusually warm or swollen, and there are no signs of infection, you can carefully apply a **cold compress (indirectly)**. Wrap an ice pack or a bag of frozen vegetables in a clean, soft cloth or paper towel. Gently hold it *around* the tattooed area, not directly on it, for short intervals (5-10 minutes) several times a day. This can help constrict blood vessels and reduce swelling. For a wrist or ankle tattoo, **elevating the limb** above heart level whenever possible can also significantly reduce fluid retention and promote circulation, aiding in discomfort reduction. For a neck tattoo, this is harder, but minimizing looking down can help.
Managing the dreaded itch
As tattoos heal, itching is an almost universal experience, and in creased areas, it can be particularly intense due to skin stretching. The cardinal rule is **never scratch**. Scratching can introduce bacteria, damage the new skin, and even pull out scabs or ink. Instead, gently pat the itchy area with the palm of your clean hand. Applying a thin layer of your recommended moisturizer can often alleviate the dryness that contributes to itching. Some people find relief from an over-the-counter **fragrance-free anti-itch cream with hydrocortisone**, but this should be used sparingly and only after consulting your tattoo artist or a medical professional, as prolonged use can thin the skin and affect healing.
Addressing adhesive irritation (for Saniderm users)
While Saniderm and similar products are excellent, some individuals can experience irritation or a rash around the edges where the adhesive meets the skin. If this occurs, it’s usually a reaction to the adhesive itself, not the tattoo. Gently remove the Saniderm, clean the area, and switch to a traditional wash-and-moisturize routine. For future tattoos, discuss this sensitivity with your artist; they might recommend a different brand of film or a traditional wrap from the start. Applying a very thin layer of a gentle barrier cream around the edges *before* application can sometimes help, but always test this first on a small patch of skin.
Optimized sleeping strategies
Unconscious movement during sleep is a major culprit for compromised healing in creased areas. Proactive sleeping positions are advanced hacks for minimizing stress:
For Wrist Tattoos: If the tattoo is on the inside of your wrist, try to sleep on your back with your arm extended and palm facing up, perhaps resting on a pillow to elevate it. If it’s on the outside, sleep on your back or side, ensuring the wrist isn’t bent or pressed against your body or the mattress. A rolled towel or small pillow under your wrist can help maintain a neutral position.
For Neck Tattoos: Sleeping on your back is almost mandatory. Use a firm, supportive pillow that keeps your neck in a neutral, straight alignment with your spine, preventing your head from tilting too far forward or to the side. Travel pillows can be surprisingly effective at stabilizing the head and neck, especially for side sleepers who might otherwise inadvertently twist their neck.
For Elbow/Knee Tattoos: Similar to wrists, try to sleep in positions that keep the joint as extended as possible. For elbows, sleep on your back with arms straight. For knees, sleep on your back with legs extended, or on your side with a pillow between your knees to prevent excessive bending.
Exercise and activity modification
For individuals with active lifestyles, modifying your workout routine is non-negotiable for at least the first 2-4 weeks, or longer if the tattoo is healing slowly. Any exercise that intensely flexes or extends the tattooed joint should be avoided. For instance:
Wrist/Elbow: Avoid push-ups, planks, heavy lifting, pull-ups, yoga poses that put weight on wrists/elbows, and any sport involving repetitive arm movements (e.g., tennis, golf). Focus on lower body or core exercises that don’t involve the upper body joints.
Neck: Avoid exercises that involve neck rotations, crunches, sit-ups (which often strain the neck), and heavy overhead lifting that requires neck stabilization. Be mindful of head position during all exercises.
Knee: Avoid deep squats, lunges, running, jumping, cycling, or any activity that puts significant strain on the knee joint. Opt for low-impact cardio or upper body strength training.
Sweating in these areas can also be problematic, as sweat can carry bacteria and irritate the healing skin. If you do engage in light activity, clean your tattoo immediately afterward.
Sun protection: The lifelong shield
While this is generally for *after* the tattoo has fully healed, it’s an ‘advanced hack’ for long-term vibrancy. Even after complete healing, a tattoo in a creased area is often more exposed to the elements due to the way skin stretches and folds. **Sun protection is paramount.** UV radiation is the number one enemy of tattoo longevity, causing ink to fade and dull. Once your tattoo is fully healed (no scabs, no flaking, skin looks and feels normal), consistently apply a high-SPF (30+) broad-spectrum sunscreen whenever it’s exposed to the sun. Even better, wear clothing that covers the tattoo. This is especially important for the neck and wrists, which are often exposed inadvertently.
Considering re-touch opportunities
Despite all best efforts, sometimes a small amount of ink fallout or patchiness is inevitable in highly mobile areas. Do not despair if this happens. Reputable tattoo artists often include one free touch-up within a certain period (e.g., 6-12 months) of the initial tattoo, especially for challenging placements. Allow your tattoo to fully heal for at least 6-8 weeks before evaluating the need for a touch-up. A professional artist can then address any faded lines or patchy areas, restoring the crispness and vibrancy of your artwork. This is not a sign of poor tattooing, but rather a realistic expectation for designs in such dynamic anatomical locations.
By integrating these troubleshooting tips and advanced strategies into your aftercare regimen, you empower yourself to navigate the unique challenges of healing tattoos in creased areas, ensuring your investment in body art yields the beautiful, lasting results you envision.
Beyond healing: Maintaining your tattoo’s vibrancy for years to come

The successful healing of a tattoo in a creased area is a significant milestone, a testament to your diligent aftercare and patience. However, the journey of tattoo care doesn’t conclude when the last scab falls off. To ensure your investment in body art remains as vibrant and impactful as the day it was inked, a commitment to long-term maintenance is essential, especially for designs located in these high-traffic, dynamic regions of the body. Think of it as preserving a masterpiece – initial framing and protection are crucial, but ongoing conservation ensures its enduring beauty.
Ongoing moisturizing: The daily ritual for elasticity
While intensive moisturizing is critical during the healing phase, it should seamlessly transition into a **daily habit for the life of your tattoo**. Skin in creased areas is constantly bending, stretching, and recoiling. Keeping this skin consistently hydrated and supple is paramount. Well-moisturized skin is more elastic, less prone to dryness, and visually appears plumper and healthier. This provides a smoother canvas for your tattoo, allowing the colors to remain crisp and the lines to stay sharp. Dry, dehydrated skin, especially in areas like the neck or wrists, can become dull, flaky, and cause the tattoo to look muted or aged prematurely. Choose a fragrance-free, non-comedogenic lotion and make it a part of your daily skincare routine, just like brushing your teeth. Applying it after showering is often ideal as your skin is more receptive to moisture then.
Consistent sun protection: The lifelong shield against fading
The sun is undeniably the primary enemy of tattoo longevity. UV radiation breaks down ink pigments, causing colors to fade, blacks to turn greenish or bluish, and details to blur over time. For tattoos in creased areas like the wrists and neck, which are frequently exposed to sunlight, **consistent, rigorous sun protection is non-negotiable**. Make it an absolute rule: whenever your tattoo is exposed to the sun, it must be protected. This means applying a high-SPF (30 or higher) broad-spectrum sunscreen liberally and frequently, even on cloudy days. Alternatively, and even preferably, cover your tattoo with UPF (Ultraviolet Protection Factor) clothing. This is especially easy for wrist tattoos with long sleeves or neck tattoos with scarves or high-collared shirts. Integrating this habit into your daily life is perhaps the single most impactful step you can take to preserve your tattoo’s vibrancy and clarity for decades.
Healthy lifestyle: Nourishing your canvas from within
The health of your skin is a direct reflection of your overall bodily health. A **healthy lifestyle** directly contributes to the longevity and appearance of your tattoos. This includes: a balanced diet rich in antioxidants (found in fruits and vegetables) and healthy fats (like omega-3s, which promote skin elasticity); adequate hydration (drinking plenty of water); regular physical activity (which improves circulation and nutrient delivery to the skin); and sufficient sleep (essential for cellular repair and regeneration). Avoiding excessive smoking and alcohol consumption is also advisable, as these can accelerate skin aging and compromise its ability to maintain its youthful appearance and, by extension, the vibrancy of your tattoo.
Regular inspections: Being your own tattoo curator
Periodically, take the time to **inspect your healed tattoo** in creased areas. Look at it in different lighting conditions. Notice any subtle changes in color, texture, or definition. Are the lines still crisp? Are the colors as bright? While some natural aging will occur, significant or rapid changes might indicate a need for professional advice. Regular inspection allows you to catch any potential issues early, whether it’s the start of sun damage, unusual skin changes, or just the natural progression of your tattoo over time. Think of yourself as a curator of your own body art, attentive to its evolving needs.
Touch-ups: An anticipated part of the journey
Even with the most meticulous care, tattoos in highly mobile, creased areas are often the first to show signs of wear and tear, simply due to the constant stretching and friction the skin endures. Therefore, it is important to view **touch-ups as a potential, and often necessary, part of the long-term journey** for these specific placements. Small areas of ink fallout, slight blurring of fine lines, or a general softening of colors over several years are not signs of a failed tattoo or poor aftercare, but rather the reality of skin dynamics in these zones. Consult with your original artist or a trusted professional if you feel your tattoo needs a refresh. A simple touch-up can dramatically restore a tattoo’s initial impact and extend its life for many more years.
Ultimately, a tattoo is not merely a picture on your skin; it is a living, evolving piece of art that ages with you. For tattoos in creased areas, this symbiotic relationship between art and the body’s movement is even more pronounced. By committing to ongoing hydration, unwavering sun protection, a healthy lifestyle, and proactive maintenance, you are not just preserving a tattoo; you are honoring the art form and ensuring that the stories and symbols etched into your skin continue to tell their tale with clarity and brilliance for a lifetime. Your dedication to its care is as much a part of the tattoo’s narrative as the ink itself, transforming a momentary act into a timeless statement.