Embarking on the journey to get your first tattoo is an incredibly exciting prospect, brimming with anticipation for the unique piece of art that will soon adorn your skin. Many individuals naturally focus their initial energy on the design itself – the intricate lines, the vibrant colors, the profound symbolism – and rightly so, as these elements are undeniably central to your tattoo’s identity. However, an equally, if not more, critical component often overlooked by first-timers is the precise placement of that design on your body. This decision, seemingly secondary, holds an immense power to elevate your tattoo from a mere image to a living, breathing extension of yourself, harmonizing with your anatomy and reflecting your lifestyle. It is the silent partner to the design, a foundational choice that dictates not only how your tattoo will appear today, but also how it will evolve with you over the decades, how it interacts with your movements, and even how it integrates into your professional and social spheres. Think of your body not as a flat canvas, but as a dynamic, three-dimensional sculpture, constantly shifting and flowing. The placement dictates how your chosen artwork will interact with this intricate form, whether it will seamlessly flow with your natural contours, accentuate your physique, or, if chosen without careful consideration, feel disconnected or even distorted over time. This foundational choice impacts everything from the perceived size and scale of your artwork to its visibility, the level of discomfort you might experience during the process, and even the ease of its healing. It is a decision that demands thoughtful reflection, merging personal preference with practical considerations, and understanding the nuances of how skin, muscle, and bone interact with ink.
Ignoring the profound impact of placement is akin to commissioning a breathtaking sculpture without considering the pedestal or the lighting – the masterwork might be exquisite on its own, but its true splendor is only unlocked when presented within its ideal context. A tattoo, at its core, is a permanent modification to your body, a piece of art that will move with you, age with you, and become an integral part of your personal narrative. Therefore, approaching its placement with the same reverence and attention to detail that you would apply to selecting the design itself is not merely advisable, but absolutely crucial for ensuring lasting satisfaction. This comprehensive guide is designed to empower you with the knowledge and insights needed to navigate the often-complex world of tattoo placement, transforming a potentially daunting decision into an informed and exciting part of your tattoo journey.
5 essential factors to weigh when picking your tattoo’s home
Selecting the ideal location for your tattoo is a multi-faceted decision that extends far beyond simple aesthetics. It requires a thoughtful evaluation of several key elements, each playing a vital role in the long-term success, appearance, and personal resonance of your body art. Tattoo artists, with their extensive experience and deep understanding of human anatomy and skin dynamics, consistently emphasize these factors when consulting with clients. By carefully considering each point, you can make an informed choice that aligns perfectly with your individual needs and aspirations, ensuring your first tattoo is a source of enduring pride and comfort.
- Visibility and lifestyle integration: Where will your tattoo be seen?
This is arguably one of the most significant considerations for any first-time tattoo recipient. The visibility of your tattoo directly impacts how it integrates into your daily life, your professional career, and your social interactions. Are you seeking a highly visible statement piece that can be openly displayed, or do you prefer something more discreet, reserved for personal reflection or specific occasions? For many, especially those in professions with strict dress codes or conservative environments, choosing a placement that can be easily covered by everyday clothing is a paramount concern. Areas like the upper arm, shoulder blade, ribcage, or thigh offer excellent options for concealment, allowing you to reveal your artwork only when and where you choose. Conversely, locations such as the forearm, wrist, hand, or neck are inherently more exposed, making a bold statement about your personality and style. Considerations must also extend to your hobbies and activities. If you are an avid swimmer or spend a lot of time outdoors, placing a tattoo in a frequently sun-exposed area like the shoulder or outer arm might necessitate a diligent sun protection regimen to prevent fading. Evaluate your typical wardrobe, your professional requirements, and your comfort level with public display. Answering these questions honestly will guide you towards a placement that enhances your life without creating unforeseen complications. Remember, a tattoo is a permanent fixture; ensuring it harmonizes with your lifestyle from day one is essential for long-term satisfaction.
- Design harmony and anatomical flow: How will the design fit the body’s curves?
The human body is a marvel of organic curves, lines, and musculature, and a truly exceptional tattoo design doesn’t just sit on the skin; it dances with it. The size, shape, and intricate details of your chosen design dictate which areas of the body will best showcase its unique characteristics. A sprawling, highly detailed piece, for instance, requires a large, relatively flat canvas to allow all its nuances to be appreciated, such as the back, thigh, or chest. Placing such a complex design on a small, curved area like the wrist or ankle would inevitably lead to distortion, loss of detail, and a cluttered appearance. Conversely, a minimalist line-work design or a small symbol might look lost on a vast expanse of skin, failing to make the impact you desire. Consider how the natural lines of your muscles and bones can enhance or detract from your tattoo. A long, slender design might flow beautifully along the forearm or calf, while a circular or geometric pattern could find its perfect home on a flatter surface like the shoulder blade or upper thigh. Tattoo artists are masters of this anatomical flow; they understand how skin stretches and moves, how muscles flex, and how these dynamics impact the visual integrity of a design. During your consultation, they will often suggest placing a stencil on different areas, asking you to move and flex, demonstrating how the tattoo will appear in motion. This collaborative exploration ensures that your design doesn’t just look good in a static image, but truly comes alive on your unique body, becoming an organic extension of your form rather than just an applied sticker.
- Pain perception and healing practicalities: How will it feel and how will it heal?
It’s an undeniable truth that getting a tattoo involves some degree of discomfort, and certain areas of the body are notoriously more sensitive than others due to the density of nerve endings, the proximity to bone, or the thinness of the skin. While pain tolerance is highly individual, general guidelines exist. Fleshy, muscular areas like the outer bicep, calf, or outer thigh tend to be among the least painful spots, as the needle has more cushion. Conversely, areas directly over bone (ribcage, spine, ankle, knee, elbow), areas with thin skin (wrist, inner bicep, top of foot), or areas with a high concentration of nerve endings (armpit, groin, nipple) are typically associated with significantly higher pain levels. For a first tattoo, especially if you’re unsure of your pain tolerance, opting for a less painful area can make the experience more enjoyable and less daunting. Beyond the initial sensation, consider the practicality of the healing process. Tattoos require diligent aftercare, including keeping the area clean, moisturized, and protected from friction or excessive movement. Areas that are constantly bending (knees, elbows), rub against clothing frequently (waistline, inner thigh), or are difficult to reach for cleaning (upper back) can present challenges during the crucial healing phase. Choosing a placement that allows for easy access and minimal disruption can significantly contribute to a smoother, more effective healing process, which in turn leads to a better-looking final tattoo. Discussing pain expectations and healing logistics with your artist is a vital step in preparing yourself for the journey ahead.
- Long-term integrity: How will your tattoo age with you?
Tattoos are designed to last a lifetime, but skin, like all living tissue, undergoes changes over time. Factors such as aging, sun exposure, weight fluctuations, and natural skin elasticity can all influence how a tattoo looks decades down the line. Some areas of the body are more prone to stretching, sagging, or significant sun damage, which can cause tattoo lines to blur, colors to fade, or designs to distort. Areas like the inner arm, the stomach, or the neck might experience more pronounced changes due to gravity or significant weight gain/loss over many years. Conversely, areas that are generally less exposed to the sun and less prone to dramatic skin shifts, such as the upper back, the outer arm, or the calf, tend to hold ink more crisply over time. While modern tattoo inks and techniques are incredibly durable, consistent sun exposure is a major enemy of a vibrant tattoo, causing colors to dull and blacks to lighten. If you choose an exposed area, committing to lifelong diligent sun protection (high SPF sunscreen, protective clothing) becomes essential for preserving your tattoo’s vibrancy. Furthermore, consider areas that experience high friction or wear-and-tear, like the palms of hands or soles of feet; while possible to tattoo, ink retention in these areas is notoriously difficult and fades rapidly. Thinking about the long-term integrity of your tattoo is a testament to the permanency of the art form and allows you to select a location that will gracefully age alongside you, remaining a beautiful and clear representation of your initial vision.
- Future canvas and narrative: How does this tattoo fit into your body art story?
For many, one tattoo is just the beginning of a larger collection. Even if you’re certain this will be your only piece, it’s wise to consider the possibility of future additions. Thinking about your body as a potential canvas for a larger narrative or collection can influence your first placement significantly. Some individuals prefer a scattered approach, placing individual pieces wherever they feel aesthetically pleasing. Others envision larger projects, like sleeves, back pieces, or leg sleeves, which require careful planning to ensure cohesion and flow. If you foresee a full sleeve in your future, starting with a small piece on your wrist might complicate the design integration later on, whereas placing it on the upper arm or shoulder leaves ample space for expansion. Consider the potential for a “story” to unfold across your skin. Will your tattoos eventually connect, or will they stand as independent statements? Leaving strategic empty spaces or choosing a placement that can serve as a starting point for a larger composition ensures that any future additions will complement rather than compete with your initial piece. Your artist can offer invaluable guidance on this, helping you understand how different placements can either open up or limit your options for future body art, enabling you to begin building your personal collection with foresight and artistic integrity from the very first needle poke.
Decoding body zones: Pros, cons, and pain levels for popular placements
Navigating the vast landscape of potential tattoo placements can be overwhelming, especially for a beginner. Each area of the body presents its own unique set of advantages and disadvantages, influencing not only the aesthetic outcome but also the sensation during the tattooing process and the practicalities of healing. Understanding these nuances for popular body zones will empower you to make a choice that aligns with your pain tolerance, lifestyle, and design aspirations. While individual pain thresholds vary, the following insights offer general guidance compiled from years of professional experience and countless client experiences.
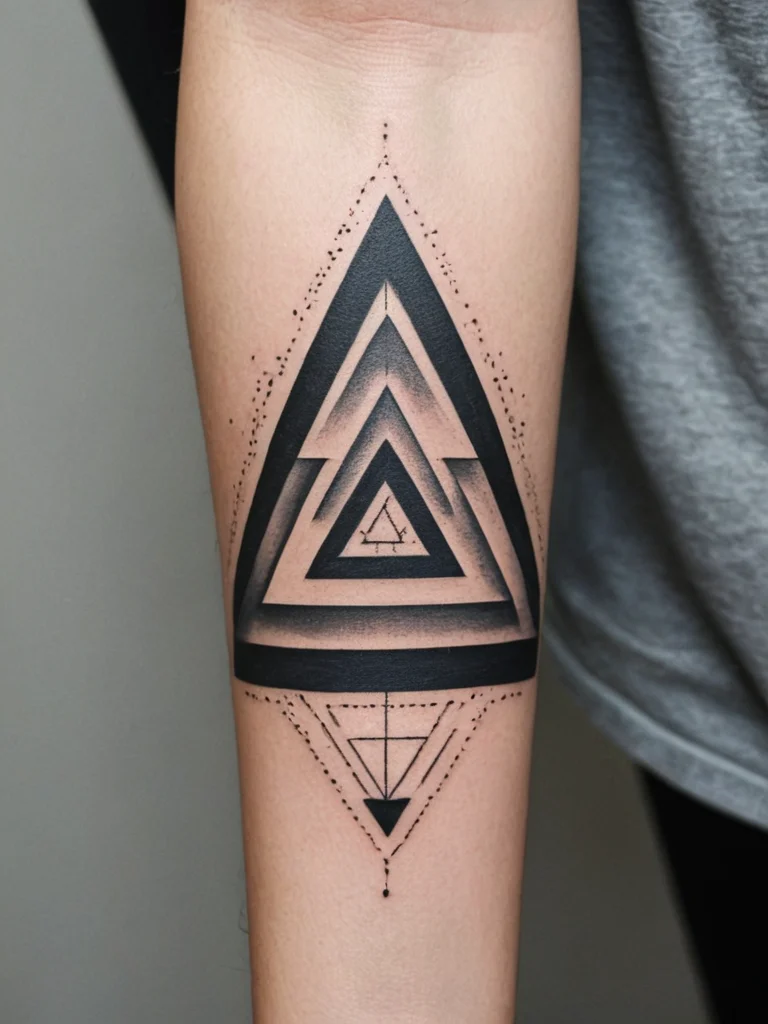
- The arm: A versatile canvas (forearm, bicep, tricep, shoulder)
The arm is arguably the most popular area for first-time tattoos, and for good reason. It offers a wide range of options, from highly visible to easily concealed spots, and generally presents a moderate pain level, making it an excellent starting point for many. Each section of the arm has its own distinct characteristics.
- Forearm (inner and outer):
Pros: The forearm is a fantastic location for designs that you want to see frequently and that you wish others to admire. It’s an easily visible area, allowing for a constant appreciation of your art. Both the inner and outer forearm offer relatively flat surfaces, making them suitable for a wide variety of designs, from intricate line work to detailed illustrative pieces. The skin here tends to be quite resilient, and healing is generally straightforward due to good circulation and ease of access for aftercare. It’s a common choice for script, geometric patterns, or symbols that hold deep personal meaning. The way designs flow with the natural lines of the arm can be incredibly appealing.
Cons: Its high visibility means it might not be suitable for those in professions with strict appearance policies, as it can be difficult to conceal with short sleeves. The outer forearm is moderately exposed to the sun, requiring diligent sunscreen application to prevent fading over time. While generally comfortable, the area closer to the wrist or elbow ditch can become more sensitive due to thinner skin and proximity to bones.
Pain Level: Generally low to moderate. The outer forearm is typically less painful, while the inner forearm, especially near the wrist or elbow ditch, can be more sensitive due to thinner skin and denser nerve endings. Most clients describe it as tolerable pressure or scratching.
- Bicep (inner and outer):
Pros: The outer bicep is a classic location, offering a broad, relatively flat surface ideal for medium to large designs. It’s easily shown off in short sleeves but also conveniently covered by longer ones, providing a good balance of visibility and discretion. The area is quite fleshy, making it one of the less painful spots on the arm. The natural curve of the bicep can also add a dynamic flow to certain designs. The inner bicep, while more sensitive, is a highly private location, only visible when the arm is lifted or bent, making it perfect for intimate or deeply personal pieces.
Cons: The outer bicep can sometimes be subject to muscle definition changes over time, potentially altering the look of the tattoo. The inner bicep is significantly more sensitive due to thinner skin and a high concentration of nerve endings, and the healing process here can sometimes be tricky because the arm bends, potentially causing friction or stretching of the new tattoo.
Pain Level: Outer bicep: Low to moderate. Inner bicep: Moderate to high. The inner bicep is often cited as surprisingly painful by many clients due to its delicate nature.
- Tricep (back of upper arm):
Pros: The tricep offers a large, relatively flat canvas, similar to the outer bicep, making it suitable for a wide range of designs. It’s easily concealable under most clothing, offering excellent discretion. It’s also a popular choice for larger, vertical designs that flow down the arm. For those with well-defined triceps, designs can beautifully complement muscle contours. Healing is typically straightforward as it’s not a high-friction area.
Cons: It can be a little awkward to view yourself, requiring mirrors. The skin here might experience some changes with age or significant muscle gain/loss. The area closer to the elbow can be more painful due to proximity to the bone.
Pain Level: Low to moderate. Generally considered one of the less painful areas on the arm, especially the fleshy middle part of the tricep.
- Shoulder (front, top, back/shoulder blade):
Pros: The shoulder and shoulder blade area provides an expansive and relatively flat canvas, ideal for larger, intricate designs or pieces that will eventually form part of a sleeve or back piece. The bone structure underneath can provide a fantastic framework for designs, allowing them to flow organically. These areas are easily concealable with clothing, offering excellent privacy. They also tend to be less painful due to muscle and fat padding, particularly the outer shoulder and shoulder blade. Healing is generally uncomplicated, as the area is not frequently bent or rubbed.
Cons: Some parts of the shoulder, particularly directly over the collarbone or shoulder joint, can be more painful. The top of the shoulder (deltoid) is often exposed to the sun, necessitating consistent sun protection to prevent fading. If you plan a full sleeve, starting here is great, but a small, isolated piece might look disproportionate if not strategically placed.
Pain Level: Low to moderate. Pain levels increase significantly when tattooing directly over the collarbone or shoulder blade bone, or near the armpit.
- Forearm (inner and outer):
- The leg: A growing trend for beginners (calf, thigh, shin, ankle)
The legs offer vast, often less-visible canvases, making them increasingly popular for those seeking larger designs or more discreet placements. They are excellent options for first-timers who might be sensitive to pain or who prefer to keep their body art private.
- Calf (outer and inner):
Pros: The calf is an exceptionally popular and versatile spot for tattoos, especially for beginners. It boasts a large, relatively flat, and muscular surface that accommodates a wide array of designs, from portraits to detailed landscapes. It’s easily concealable under trousers but can be proudly displayed with shorts or skirts. The pain level is generally low to moderate due to ample muscle padding. Healing is straightforward as the area doesn’t bend excessively, and circulation is good. It’s an excellent choice for vertical designs that run down the leg or wrap-around pieces.
Cons: The outer calf is moderately exposed to the sun, requiring sunscreen. The inner calf can be slightly more sensitive, especially closer to the shin bone. Swelling during healing can sometimes be more pronounced in the lower leg due to gravity, which is normal and typically resolves quickly.
Pain Level: Low to moderate. Most people find the calf very tolerable, often described as a dull pressure or vibration.
- Thigh (front, back, inner, outer):
Pros: The thigh is an expansive and incredibly versatile canvas, making it ideal for large, complex, and highly detailed pieces. It offers ample space for designs that require a lot of room to breathe. It is also one of the most private locations, easily concealed by almost any clothing, offering absolute discretion. Generally, the thigh is one of the least painful areas to tattoo due to its abundant muscle and fat padding. Healing is usually very smooth and comfortable, as the area experiences minimal friction and is easy to keep clean. It’s perfect for expansive natural scenes, large-scale illustrative work, or intricate patterns.
Cons: Its size means larger tattoos will require longer sessions and more significant financial investment. Some areas, like the inner thigh, can be more sensitive due to thinner skin and proximity to the groin area. The skin on the inner thigh is also prone to stretching or changes with weight fluctuations over time, which can affect the tattoo’s appearance.
Pain Level: Generally low. The outer and front thigh are among the least painful spots on the entire body. The inner thigh can be moderate due to sensitivity.
- Shin:
Pros: The shin offers a long, flat surface, excellent for vertical designs, script, or anything requiring a linear flow. It can be a visually striking placement, particularly for designs that wrap around from the calf. Like other leg placements, it’s easily concealed.
Cons: This is a significantly bonier area than the calf or thigh, meaning pain levels can be considerably higher, especially directly over the shin bone. The skin is thinner here, and the vibrations from the tattoo machine can be intense and uncomfortable as they reverberate through the bone. Healing can be a bit more challenging due to potential friction from trousers or shoes, and the area can be prone to swelling.
Pain Level: Moderate to high. This is one of the more painful spots for many, especially directly on the bone.
- Ankle and foot (top, side, back):
Pros: Ankle and foot tattoos are known for their delicate beauty and ability to express subtle personal style. They are popular for smaller, intricate designs like script, symbols, or floral elements. They can be easily displayed with sandals or certain footwear, or discreetly covered with socks and shoes. These areas offer a unique charm and can be quite elegant.
Cons: These areas are notoriously painful due to the abundance of bones, thin skin, and nerve endings, particularly on the top of the foot and directly over the ankle bone. Healing can be challenging because the feet are constantly in motion and exposed to friction from shoes and socks, which can irritate the fresh tattoo and increase the risk of infection or poor ink retention. Swelling is also very common in these areas. Artists often recommend avoiding the soles of the feet due to extremely poor ink retention.
Pain Level: High. Many consider the top of the foot and ankle to be among the most painful tattoo placements. This is generally not recommended for a first-time tattoo, unless you have a very high pain tolerance and are fully prepared for the challenging healing process.
- Calf (outer and inner):
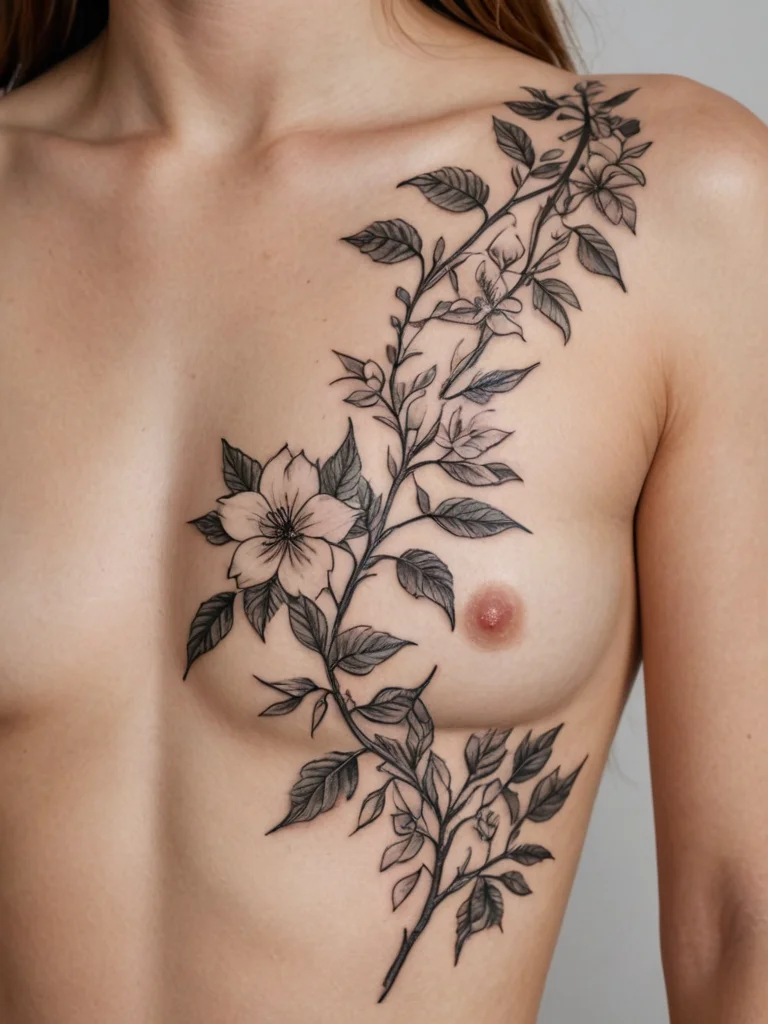
- The torso: Intimate and expansive canvases (ribcage, back, sternum, side)
Torso placements offer some of the largest canvases on the body, ideal for elaborate, deeply personal, or statement pieces. They are almost universally concealable, making them perfect for those who prefer their tattoos to be private or revealed only on special occasions. However, many of these areas are also associated with higher pain levels.
- Ribcage/Side:
Pros: The ribcage offers a large, relatively flat surface for sweeping designs that can flow with the natural curve of the body. It’s an incredibly private location, easily hidden under clothing, making it ideal for deeply personal or symbolic tattoos. The privacy can also make the tattooing experience feel more intimate. Designs here often look very elegant and can be quite expansive.
Cons: This area is widely considered one of the most painful places to get tattooed due to the thinness of the skin, the proximity to the ribs and sternum, and the constant movement from breathing. The vibrations from the tattoo machine can be intense and resonate through the chest cavity. Healing can sometimes be slightly more challenging due to the constant motion of breathing and potential friction from bras or tight clothing.
Pain Level: Very high. This is often cited as one of the most painful tattoo locations. Not typically recommended for a first tattoo unless you have a very high pain threshold.
- Back (upper, middle, lower, spine):
Pros: The back is the largest canvas on the human body, providing unparalleled space for grand, intricate, and expansive designs, from full back pieces to detailed mandalas or large-scale illustrative work. It offers maximum discretion, as it’s almost always covered by clothing. Pain levels are generally moderate in the fleshy areas (upper back, lower back, sides of the middle back) due to significant muscle and fat padding. Healing is usually straightforward as the area is not prone to constant bending, though sleeping positions need to be considered. The back is an incredible area for a true masterpiece.
Cons: Directly over the spine and shoulder blades can be quite painful due to the bone proximity and thinner skin. It’s difficult to perform aftercare independently, often requiring assistance. Seeing the tattoo yourself requires a mirror. The upper back can be subject to some sun exposure, depending on clothing.
Pain Level: Varies greatly. Upper/lower back (fleshy parts): Low to moderate. Over the spine or shoulder blades: High.
- Sternum/Underbust:
Pros: This central chest area, particularly popular for intricate mandala designs or delicate script, offers a visually striking and symmetrical canvas. It is a highly personal and often intimate placement, typically only revealed in specific clothing or situations. The relatively flat surface allows for detailed work that can be quite stunning.
Cons: The sternum is extremely bony, making it one of the most painful areas to tattoo. The vibrations can be intense, and the skin is very thin. For women, the area underneath the bust can be challenging for healing due to friction from bras, especially during the initial stages. Scarring is also a slightly higher risk in this area due to the delicate skin.
Pain Level: Very high. This is another area commonly cited as extremely painful, akin to the ribcage or armpit.
- Ribcage/Side:
- More delicate areas (wrist, hand, neck, behind the ear) – Proceed with caution for beginners:
While aesthetically appealing, these areas often come with unique challenges that first-timers should be acutely aware of. Tattoo artists often advise caution or suggest alternative placements for a first tattoo in these areas due to high pain levels, challenging healing, or significant social implications.
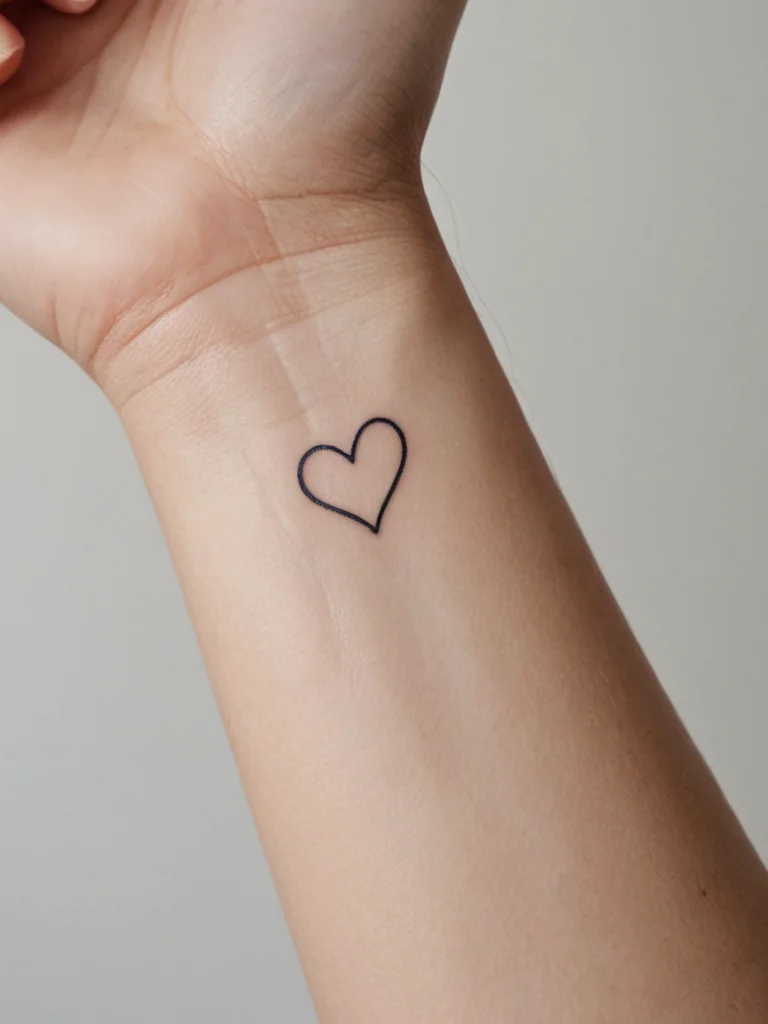
- Wrist (inner and outer):
Pros: Extremely visible and popular for small, meaningful symbols, script, or delicate designs. The inner wrist, in particular, is a common choice for its accessibility and personal visibility. Designs here can be very elegant and intimate.
Cons: The inner wrist is generally considered a high-pain area due to numerous nerve endings, thin skin, and proximity to veins and tendons. Both inner and outer wrist tattoos are highly exposed and often impossible to conceal, which can be an issue for certain professions. They are also prone to more rapid fading due to constant movement, sun exposure, and daily wear and tear. Healing can be tricky due to constant bending and potential rubbing from clothing or watches.
Pain Level: Moderate to high. Many find the inner wrist surprisingly painful. Not recommended for those very sensitive to pain for a first tattoo.
- Hand and fingers:
Pros: High visibility and a bold statement. Popular for small, symbolic designs, or as part of larger sleeve work. Can be very stylish and expressive.
Cons: Extremely high pain due to thin skin, bones, and nerve endings. Hands and fingers are constantly exposed to friction, washing, and sun, leading to very poor ink retention and rapid fading. Touch-ups are almost always required, often frequently. Many artists are hesitant to tattoo hands as a first tattoo, preferring clients to have experience with the process due to the unique challenges and potential for rapid fading. They are also virtually impossible to conceal, which carries significant social and professional implications.
Pain Level: Very high. One of the most painful and challenging areas for tattooing and healing. Strongly discouraged for a first tattoo.
- Neck and behind the ear:
Pros: Very high visibility for bold personal statements. Behind the ear is a subtle yet charming spot for small, delicate designs. Neck tattoos can be incredibly striking and expressive, often seen as a mark of commitment to the tattoo lifestyle.
Cons: Both areas are generally high pain due to thin skin and proximity to bone/nerve clusters. Neck tattoos are extremely visible and carry significant social and professional implications; they are often considered a “job stopper” in many industries. Healing can be challenging due to hair, clothing friction, and constant movement. Behind the ear tattoos can also fade more quickly due to hair and frequent washing.
Pain Level: High to very high. Not recommended for a first tattoo due to pain and significant social considerations.
- Step 1: Research and inspiration beyond the design.
While you’ve likely spent countless hours curating your dream design, now is the time to shift your focus specifically to placement inspiration. Look at thousands of tattoos on different body types and in various locations. Utilize platforms like Pinterest, Instagram, and dedicated tattoo art galleries, but filter your searches to focus on placement. Observe how different designs interact with the contours of the body. Pay attention to how a minimalist line piece looks on a forearm versus a ribcage, or how a large illustrative tattoo fills the space on a thigh compared to a back. Notice how tattoos wrap around limbs, accentuate muscle lines, or hide discreetly. Save examples that appeal to you, noting not just the design but specifically the placement and how it works with the individual’s anatomy. This visual research will begin to train your eye to see the body as a three-dimensional canvas, helping you understand how flow, scale, and movement play a crucial role in a tattoo’s overall impact. Consider not just what looks good in a static photo, but how you imagine it looking as you move, work, and live your life.
- Step 2: Self-assessment and honest reflection.
With a clearer understanding of potential placements, it’s time to turn that critical eye inward and apply the “5 Essential Factors” discussed earlier directly to your own life. Be brutally honest with yourself. Consider your profession: does your job have strict appearance guidelines? Will a highly visible tattoo impact your career trajectory or client interactions? Reflect on your personal style: do you typically wear clothing that would cover or expose your desired placement? Are you comfortable with strangers seeing and potentially commenting on your tattoo, or do you prefer it to be a more private statement? Think about your pain tolerance: are you someone who can endure significant discomfort, or would you prefer a relatively easier experience for your first piece? Ponder your future: do you anticipate major life changes, such as significant weight fluctuations, pregnancy, or shifts in career paths, that might impact your chosen spot? This introspective phase is crucial for aligning your tattoo choice with your reality, rather than just an idealized vision. It’s about finding harmony between your aesthetic desires and your practical lifestyle.
- Step 3: Temporary mock-ups and living with the idea.
This is arguably the most critical and often overlooked step in the placement confirmation process. Do not rely solely on imagining your tattoo in place. Instead, create temporary mock-ups and literally live with your potential tattoo for a few days or even a week. There are several effective ways to do this: use temporary tattoo paper to print your design and apply it to the spot, draw the outline directly onto your skin with a washable marker, or cut out a paper stencil of your design and tape it to the area. The goal is to see how the tattoo looks on your body in various scenarios: when you’re dressed for work, when you’re exercising, when you’re relaxing at home, and in different lighting conditions (natural light, indoor lighting). Pay attention to how it appears when your muscles flex and relax, when your arm bends, or when you sit and stand. Does it still look proportionate? Does it distort unpleasantly? Does it feel comfortable? Does it rub against clothing or jewelry? This active visualization allows you to experience the tattoo’s presence without the commitment, often revealing nuances you wouldn’t have considered from a static mental image. It’s your personal dress rehearsal before the grand performance.
- Step 4: The mirror test and dynamic observation.
While temporary mock-ups help you “feel” the tattoo, the mirror test allows for comprehensive visual assessment. Stand in front of a full-length mirror and observe your body with the temporary tattoo from all angles. Twist, turn, raise your arms, bend your knees, and flex your muscles. See how the design interacts with your body’s movement. Does it flow naturally, or does it look awkward when you move? Ask yourself if the perceived size and scale are still accurate when viewed from a distance, or when you’re moving. Sometimes, a design that looks perfect on a flat paper might shrink or expand visually when placed on a curved or moving body part. If you have a friend or family member whose opinion you trust, ask them to observe you as well. They might notice subtle shifts or perspectives that you miss. This dynamic observation is key to ensuring that your tattoo will not only look good statically but will also integrate beautifully with your living, moving form. Remember, a tattoo is not a painting hung on a wall; it’s an extension of your dynamic self.
- Step 5: Document and consolidate your thoughts.
As you go through the mock-up and mirror test phases, take photos from various angles and in different poses. This creates a visual record that you can review later or share with your artist during your consultation. Make notes about what you liked, what you didn’t, any unexpected observations, and any concerns that arose. Did the tattoo feel too big or too small? Did it get in the way of your clothing? Did it look awkward when you raised your arm? These documented thoughts are invaluable. They provide concrete feedback for yourself and, crucially, for your tattoo artist. Having a clear idea of what you want and, more importantly, what you don’t want, allows for a more productive and efficient consultation, ensuring that when you finally sit in the chair, you do so with absolute confidence in your chosen spot.
- The artist as your anatomical guide and flow expert.
Before any ink touches your skin, your artist will want to discuss your chosen placement in detail. Be prepared to share all your thoughts, concerns, and any insights you gained from your mock-up process. Your artist possesses an intuitive understanding of how designs interact with the body’s natural contours – the sweep of a muscle, the curve of a bone, the way skin stretches and folds. They can visualize how your chosen design will flow with your unique anatomy, often suggesting subtle adjustments to scale, orientation, or even the design itself to ensure it complements your physique perfectly. For instance, they might advise against placing a rigid geometric design on an area that experiences significant movement, or suggest slightly angling a piece to better follow the line of a limb. They see your body as a living sculpture, and their goal is to ensure your tattoo enhances its form rather than fights against it. Trust their expertise; they’ve tattooed countless bodies and understand the long-term implications of every placement decision.
- The crucial stencil application: Your final preview.
Once the design is finalized, your artist will prepare a stencil – a temporary, ink-based outline of your tattoo. This is perhaps the most critical moment in confirming placement. The artist will apply the stencil to your skin, often using a special solution that allows it to adhere temporarily. Do not rush this step. This is your final, tangible preview of how your tattoo will look in its chosen spot. Once the stencil is on, your artist will invite you to stand up, walk around, look in a mirror, and move the body part. This is your opportunity to truly see the design on your body, in motion and from different angles. Take your time. Don’t feel pressured to give an immediate ‘yes.’ Ask your artist to move it slightly if it doesn’t feel absolutely right. A slight shift up, down, left, right, or even a subtle rotation can make a world of difference in how the tattoo sits on your body. Remember that once the ink goes in, it’s permanent. A good artist will welcome your thoroughness and patience at this stage; they want you to be 100% confident and happy.
- Open communication and addressing final concerns.
This is your last chance to voice any lingering doubts or ask any final questions before the needle starts. Perhaps the pain in that area seems more daunting now, or you’re suddenly worried about how it will look with a specific piece of clothing. Be completely honest with your artist. A professional artist will respect your concerns and address them with empathy and knowledge. They can explain the sensation you might experience, offer tips for managing discomfort, or even suggest a minor adjustment to the placement that resolves your worry without compromising the aesthetic. If after seeing the stencil and discussing with your artist, it still doesn’t feel right, it is absolutely acceptable – and indeed, encouraged – to pause and reconsider. Rescheduling an appointment is always preferable to living with a tattoo in a location you regret. Your peace of mind and long-term satisfaction are paramount.
- Confirming your readiness: The ultimate “yes.”
Only when you feel an undeniable sense of confidence and excitement, a profound certainty that this is the perfect spot for your artwork, should you give your artist the ultimate “yes.” This final confirmation should come from a place of informed decision-making and genuine comfort. When you look at the stencil in the mirror and feel that surge of excitement and rightness, that’s when you know you’ve found your perfect tattoo placement. You’ve meticulously navigated the journey from abstract idea to concrete reality, collaborating with an expert to create a piece of art that is not only beautiful in its design but also perfectly harmonious with the canvas it adorns. This meticulous process ensures that your first tattoo will be a source of pride and joy, a testament to thoughtful planning and artistic collaboration, rather than a cause for future second-guessing. You are not just getting a tattoo; you are embarking on a journey of self-expression, and finding its perfect home is the first, most crucial step.
Ultimately, your artist is the best resource for detailed information on pain levels and healing specific to your chosen design and body type. They can offer personalized advice and help manage expectations based on their extensive experience.From idea to ink: Step-by-step guide to confirming your ideal spot
Once you’ve absorbed the foundational knowledge about factors influencing placement and the characteristics of various body zones, the next crucial step is to actively engage in a process of self-discovery and visualization. This isn’t just about picking a spot; it’s about confirming that the chosen location feels instinctively right, that it resonates with your aesthetic preferences, and that it integrates seamlessly into your everyday life. This methodical approach minimizes the risk of regret and maximizes your satisfaction with a permanent piece of art. Approach this phase with an open mind and a willingness to experiment; after all, it’s far better to adjust your placement now than to wish you had later.
Ready for ink: Collaborating with your artist for placement perfection
You’ve done your research, reflected on your lifestyle, and meticulously tested temporary mock-ups – now comes the exciting stage of bringing your vision to life by collaborating with your tattoo artist. This is where their expertise truly shines, transforming your thoughtful considerations into a tangible reality. Remember, your tattoo artist isn’t just a technician; they are a skilled professional, a body art expert who understands anatomy, ink dynamics, and the subtle art of how a design interacts with the human form. Their insights are invaluable, and an open, honest dialogue with them is the final, crucial step to achieving placement perfection.